This is a tutorial on how you can edit the text in your document using the Redaction Tool and the Free Text Tool.
Redaction
Select the redaction tool from the toolbar [3] and select the preset option at the bottom of the screen [4]
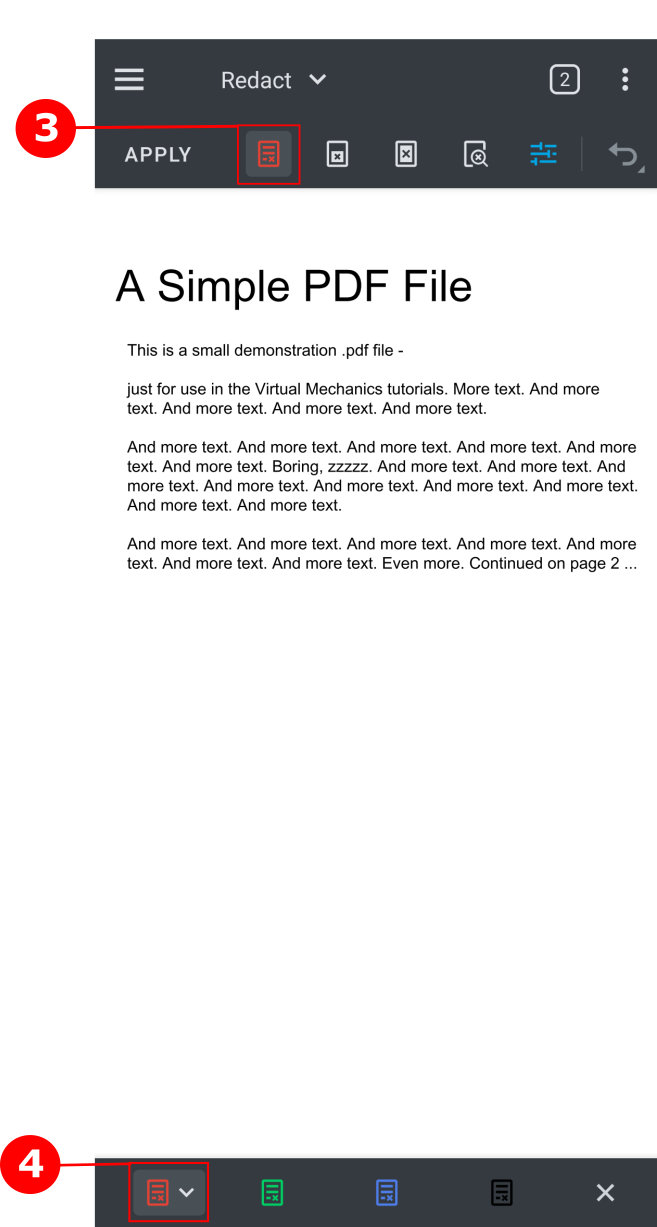
Change the border and fill color [5] to match the background color of your document, in this example we are using white. Then press the X, to the right of Style, to close the Style Dialog.

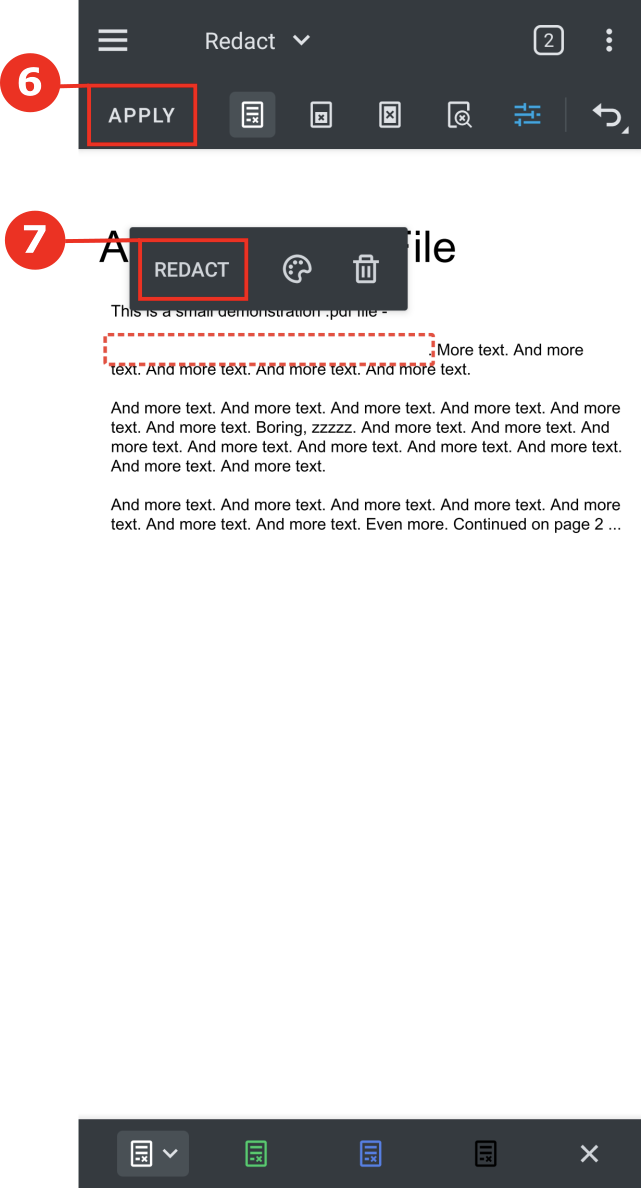
Highlight the text you want to replace in the document and tap redact [7] if you wish to redact the selected text. If you have multiple redaction annotations not yet redacted, you can tap apply [6] if you wish to apply all redactions on this document.
Annotate New Text
Now that we have removed the unwanted text from our document we can add the new text by using the Free Text Tool.
Using the toolbar switcher select the Annotate Toolbar, then scroll through the toolbar until you find the Free Text Tool [8]. Select the preset [9] at the bottom of the screen if you want to change the Free Text Tool style.
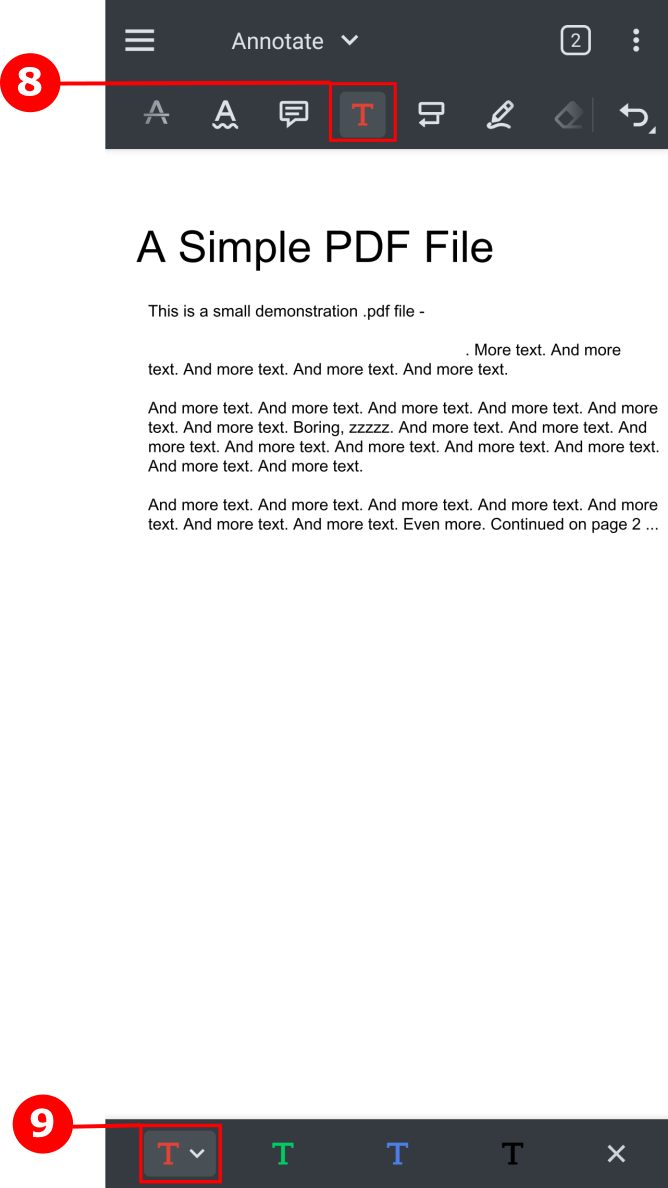
In the style dialog you can change the text style to match the document or make it stand out.

Once you have changed your style to your desired settings you can begin to add your text to the document.
If you find the text style does not match the document or you just want to change it, you can tap the annotation you just added and select the style button[10].
This will open the style dialog and allow you to make changes top the text in the selected annotation.
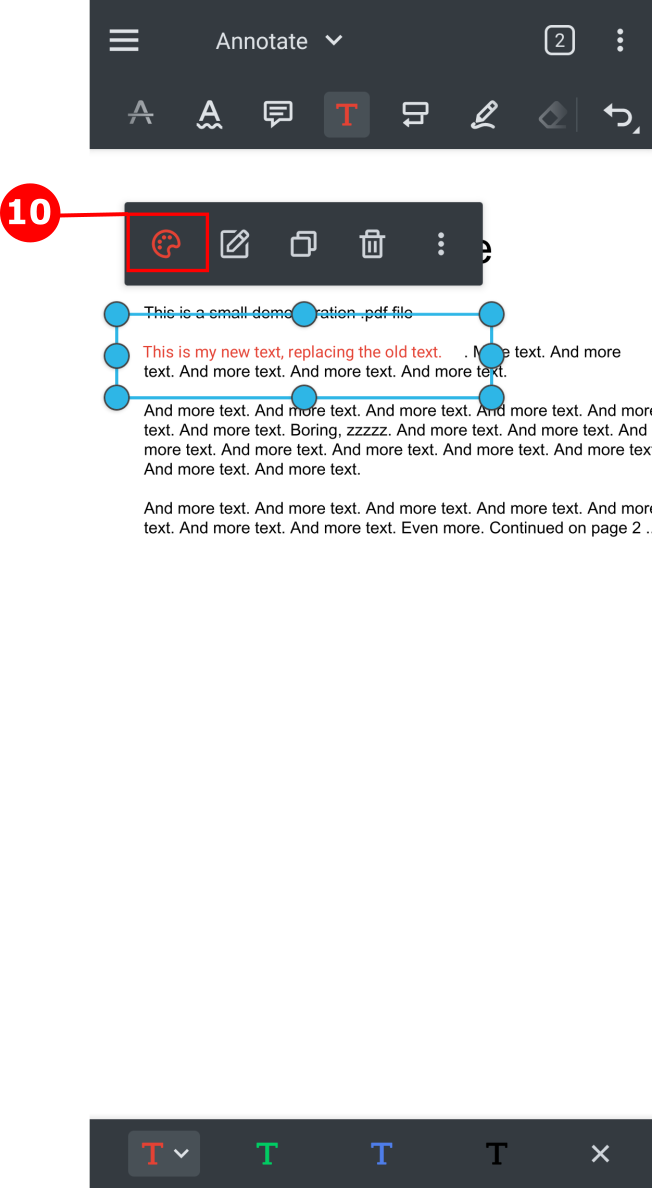
In the below example I changed the text size and color, then repositioned the annotation in the document to better fit the documents text.
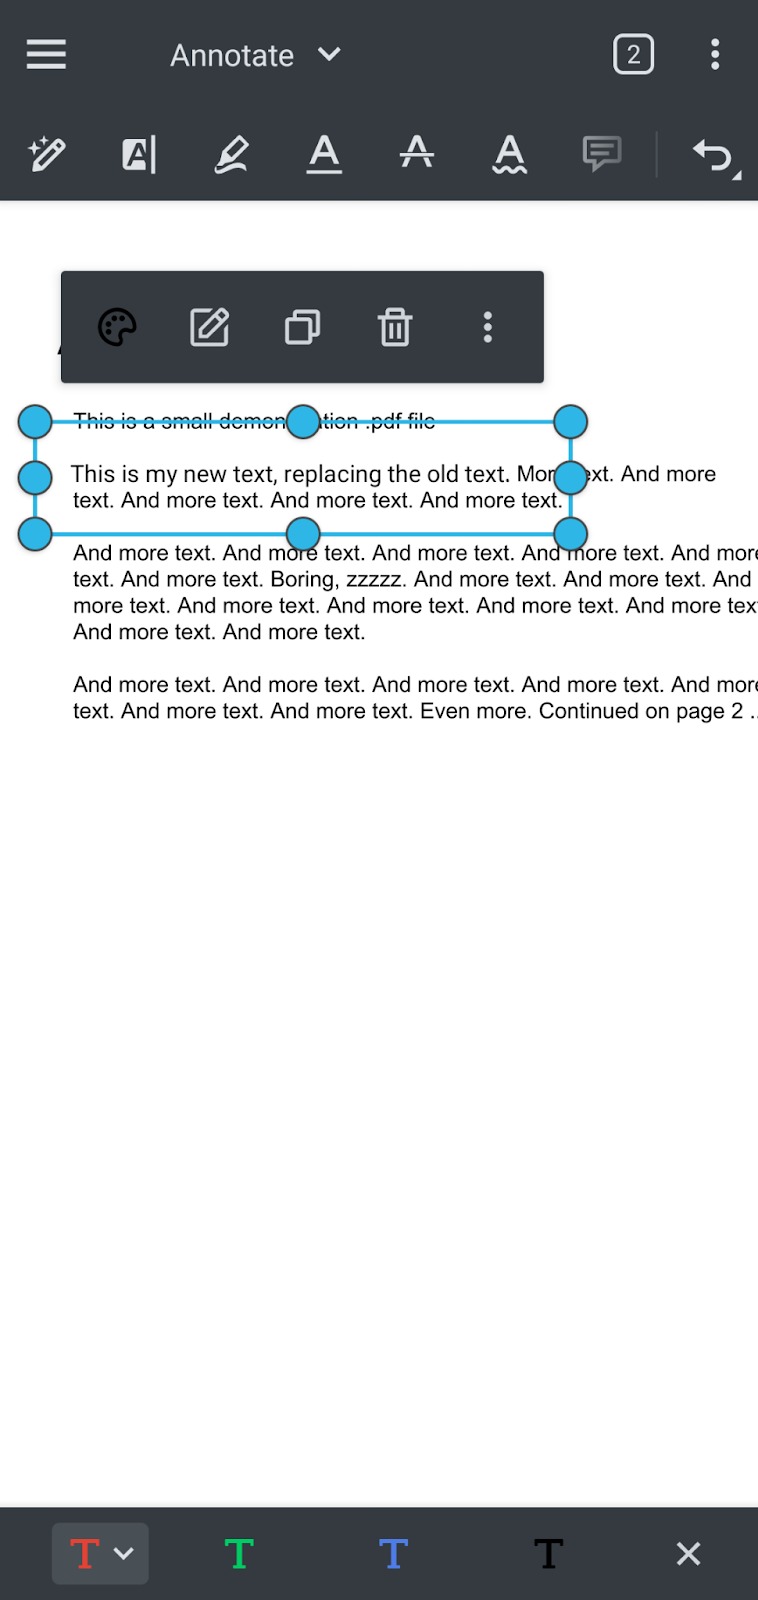
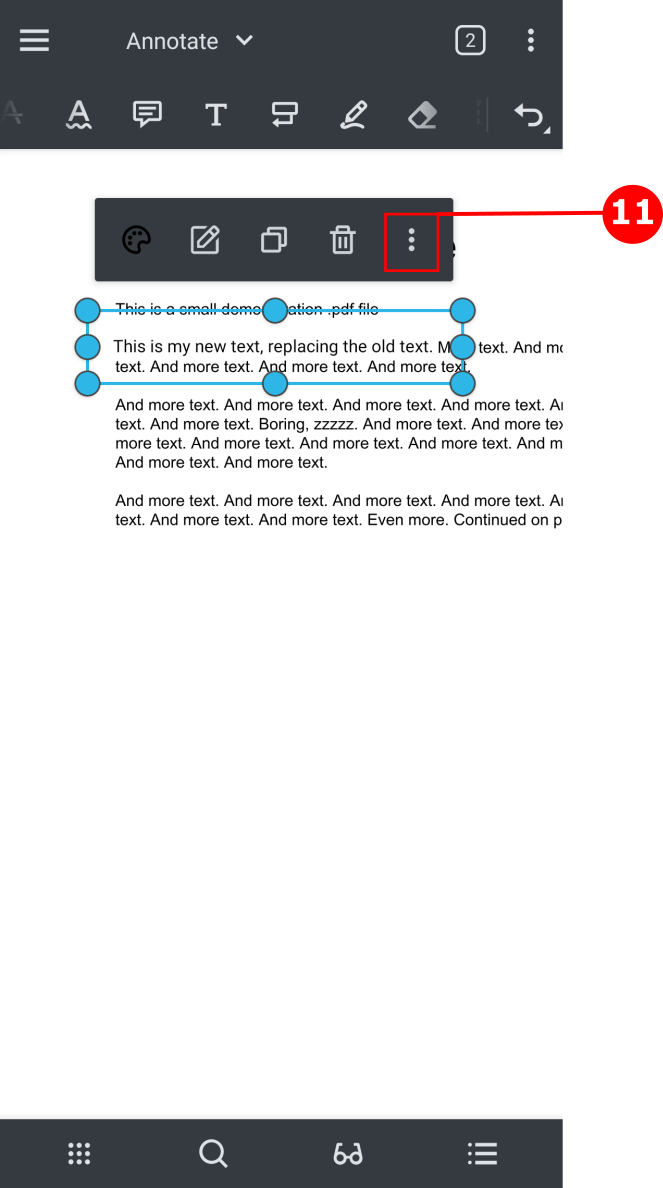
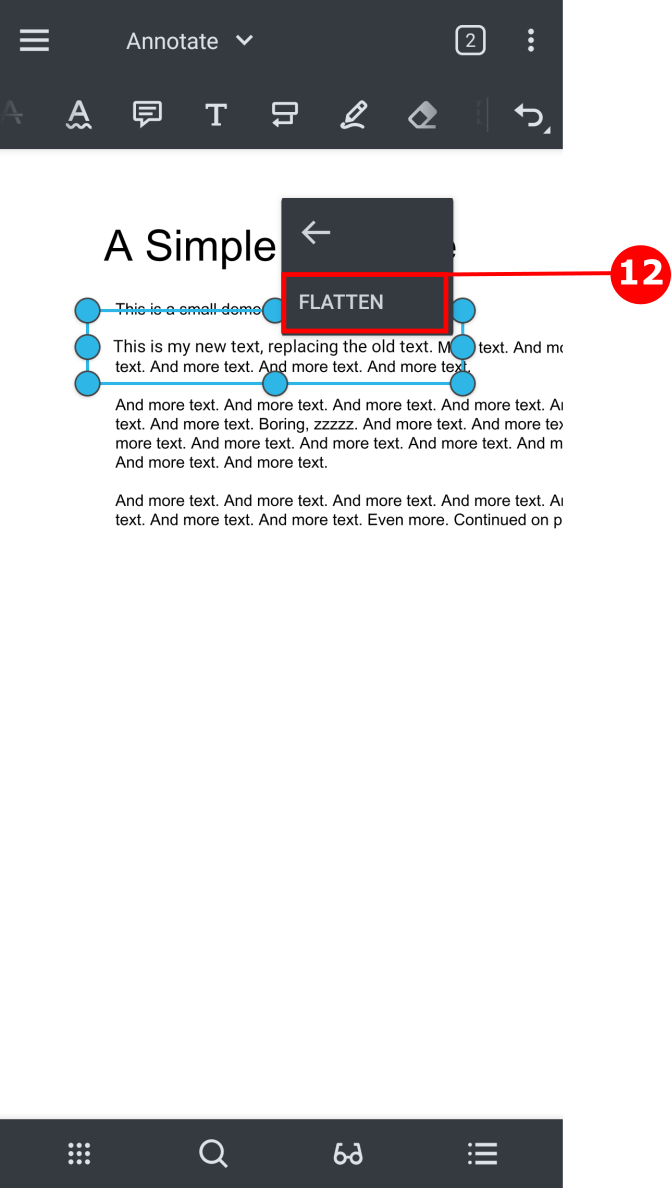
The last step is to flatten your Free Text annotation. Select the annotation you created, tap the 3 dots [11] then select flatten [12].
Final Result
Thats it, once you have made all your changes and flattened your annotations your document is ready to be saved.
Was this article helpful?
That’s Great!
Thank you for your feedback
Sorry! We couldn't be helpful
Thank you for your feedback
Feedback sent
We appreciate your effort and will try to fix the article

